Microsoft Azure Purview —Intro & Data Classification using Data Map
Opening Insights :
Azure Purview promises a slew of features to govern the data holistically and keep tenants of governance-related components in one place. With security and privacy taking up first place and runner-up in any data-based solutions having a sophisticated data governance tool might be handy for corporations that deal with data.
Why tool:
Firstly, it keeps you organized. The tool knows what it does.
Secondly, you don’t have to break your head when regulatory frameworks like GDPR constantly change the rules and regulations. For example, these tools strive to keep you insured from classifying any new type of sensitive data elements. Take India’s Aadhaar card for example. Data Governance tools update their classification policies to mark it as PII across all your data assets automatically in the future scans.
Thirdly, having a SaaS gives you a head start. It reduces your anxiety a lot by keeping up the data governance platform up to date, providing scalability when in need, security to the most possible extent, outstanding service reliability based on SLA, and cost efficiency when business value and ROI are assessed diligently.
Lastly, data stewardship is right out of the box.
What is not considered :
Business Case, Value, and ROI: Data projects in every organization have their own requirements and need. It is hard for me to guide you on this. So, take a balanced and well-rounded approach while adding/modifying the components of a data architecture. Remember TOGAF,EA et al here.
Diving into the Data Map Feature:
Data Connectors: Purview gives you hosts of data connectors. Check the Documentation for more. I chose ADLS.
Data Size Used for Testing: Public Titanic data set from Kaggle. I chose this because the data set contains the names of deceased passengers. I want to test whether Purview can classify it as “Personal”. The data set is very minuscule though.
Testing Data Map: Creating a Data Map is the first step in Data Cataloguing process with Purview tool.
File used: test.csv from the titanic data set.
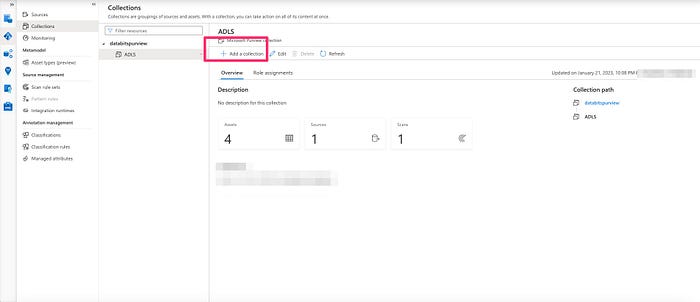
- The first step is creating a collection. The collection helps you to group the data assets-based on data domains and business lines.

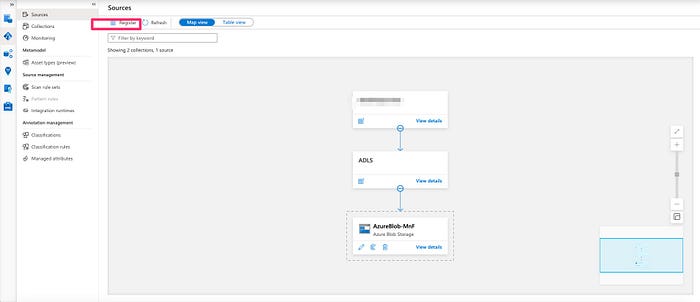
2. Next, register a source. I chose Azure Blob Storage which was within my azure account.

3.Remember to give appropriate permissions in the storage account. Storage Blob Reader for the Purview managed identity is the least minimum that one must take care of.
4. Next, scan the asset.
5. The good part is Purview automatically selects the scan rule set based on the asset source type — in this case, AzureStorage.

6. Let the data map run. Remember to monitor in the Monitoring tab.

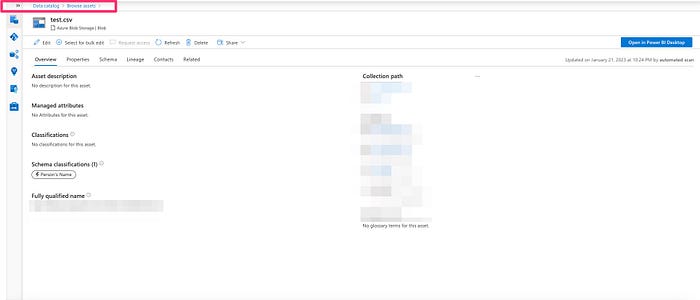
7. Once the Data Map run is complete, navigate to the browse assets page and see the results. Purview indeed classified that the asset has a human name. This is what exactly I wanted to see.

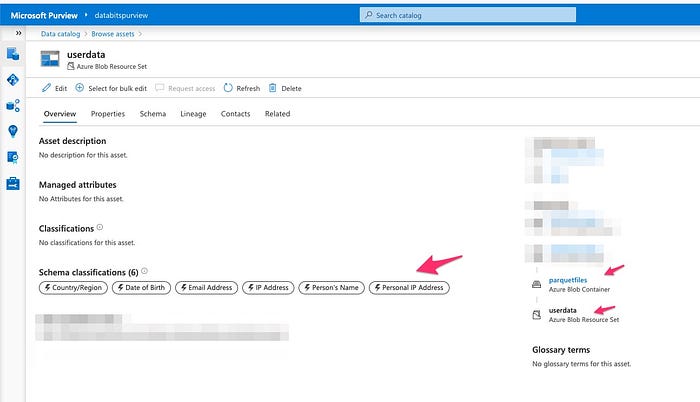
Diving into Resource Set functionality: Dealing with Parquet or JSON partitioned files is always tricky. Multiple files would be represented as one physical file on the client side. How do you represent that as one single entity in your purview data catalog? It is easy. Purview reads all parquet files within a container as one entity. The mechanism called here is resource set. It worked like charm without any extra settings.


Final Take on Data Map:
Easy to set up and run scans.
Nice on forcing a scan rule set. One can add custom policies if needed.
No need to write any code. Everything is drag and drop.
Resource set scanning a sweetener.
Next is on Data Catalog . Stay Tuned..
Resources : Microsoft Documentation ,Kaggle and Github.
Disclaimer The thoughts are very personal, and the post and its contents are not related to my organization.
